THIS BLOG STARTS FROM THE BOTTOM OF THE PAGE ENTITLED "SPLINES".
Conclusively this project has helped me loads, its enabled me to look back and personally reflect on the weaker points of the character animation and try and improve that and other projects for the future, i had fun doing this blog and i think it was a wise choice to do bits of several parts of character animation this has probably widened my knowledge of character animation and the tools used in Maya to help make things easier. During Mike's unit i will be continuing to update this blog to help develop my skills more so as i feel it would be a waste not to take advantage of this blog. To personally reflect on my work I'd say in the past I couldve worked harder, and could have helped myself with developing my skills a lot more, and i think that's what this unit has helped me realize the most, that to be really good at character animation or anything within an industry i have to learn as much technique as possible and every day not doing nothing is a day wasted. I've had a lot of fun doing this unit and i hope it was a delightful read, now its time to put it all into action in my final film!
Secondary Animation
secondary animation can mean a whole number of things, which is why I doubt I will have it all covered, this is also more research based than practical as it would take forever to animate everything there is to know about secondary animation, but the reason I decided to look into this was strictly because of my short film in Mike's project.
So firstly i went round searching for the definition of secondary animation (i always do this out of habbit but mainly so that i have a clear view of what it is exactly, I've always known the basics but to get a full understanding of the meaning i always feel the need to look it up!)
Anyway, i came across this website http://tysonibele.com/Main/Tutorials/Secondary/secondary.htm and read this really interesting and simple rule of thump when it came to secondary animation:
"The Key: As stated by a balding genius many years ago whose name eludes me at the moment, "For every action, there is an equal reaction". By far, this is one of the most important things to remember when animating. Without remembering this very basic thing, your animation will lack proper weight and motion, and therefore will lack believability."
Obviously i am aware this is Newtons theory but i never thought to incorporate it into animation, and i always find with theories like that in mind it makes the process of animation so much easier!
Another thing i read off of the site is:
"The idea is, that as animate things move around in world-space, there are some motions that can be controlled, and there are some motions that cannot be controlled. The motions that cannot be controlled (or at least controlled easily) fit nicely into the catagory of "secondary motion". "
So basically secondary animation could be described as an involuntary reaction to a voluntary action.
ITS ALL PHYSICS!!
At the bottom of the page on the website it shows some beautiful examples of how secondary animation can make a HUGE amount of difference when it comes to animating, but to look quickly i've put the links below! :)

Below are some more examples of secondary animation, this time from the book "The illusion of life" by Frank Thomas and Ollie Johnston.

"According to Ollie Johnson and Frank Thomas who were Disney animators, “DRAG," in animation, for example, would be when Goofy starts to run, but his head, ears, upper body, and clothes do not keep up with his legs (Lightfoot par.6). They state ‘Drag’ as example of how secondary animation is an important aspect of their animations created within the Disney studio."-reference from Nathan Millar
THE TAIL
THE BOX
THE LAMP
With secondary animation
But there's more to secondary animation than just flopping about from front to back, below is a list that i have come up with that i believe to be secondary animation:
- MOVING HAIR
- MOVING CLOTHES
- FROWN MARKS
- CHEEK MOVEMENT
- INVOLUNTARY EYEBROW MOVEMENT

Below are some more examples of secondary animation, this time from the book "The illusion of life" by Frank Thomas and Ollie Johnston.

"According to Ollie Johnson and Frank Thomas who were Disney animators, “DRAG," in animation, for example, would be when Goofy starts to run, but his head, ears, upper body, and clothes do not keep up with his legs (Lightfoot par.6). They state ‘Drag’ as example of how secondary animation is an important aspect of their animations created within the Disney studio."-reference from Nathan Millar
the blog also explains the aspects of secondary animation in detail:
"Follow Through depends on:
• Primary action of the character
• Weight and degree of flexibility of appendage
• Air resistance• Follow Through is how you terminate the motion (par. 7)
Not only does the speed, direction and weight of the primary motion effect the secondary motion but the environment it is situated within does as well.
Overlap depends on:
• Force transmitted through a flexible joint
• Progressively Breaking Joints
• No complete stop, before another action is started
• Nothing happens at the same time, this will give a feeling of solidity and weight (Jones par.7)
By placing the begging and end of secondary animation on separate keys than the primary animation, the animation as a whole will be more believable because secondary movement in reality. Also, because it ends after the end of the primary movement it continues despite if the primary object has stopped dead. According to Ollie Johnson and Frank Thomas, “Overlapping action is when the character changes direction while his clothes or hair continues forward” (Lightfoot par. 6). The animation not only is more believable but more visually stimulating because of the extra movement.
Follow Through: Posing Overshoot
Posing Overshoot:
• Natural motion does not stop abruptly or it will look mechanical
• Organic motion moves a little past the termination point before the “settle” pose…this is called “overshoot”
• Like a pendulum swing, the joints will over compensate for the motion and settle; then come to a complete rest
• Overshoot and Settle add accent and weight to your moves
• General Rule: 6-8 frames to settle, and at least 8 frames for the overshoot. If its only a hand gesture use less time (Jones par.10)
Here Jones explains where to situate the keys of the secondary movement on the timeframe. ‘Settle’ is the end of the secondary animation situated after the primary motion.
Overlapping Motion: Progressively Breaking Joints
Using Timing for Overlap:
• Each part of the hierarchy must stop at a different time to achieve overlapping motion = Progressively Breaking Joints
• The “lag” in timing of each joint in the hierarchy creates a whipping motion
• The breaking of each joint works well for cloth or appendages that are light enough to demand the fluid action
• The end of the tree is the last thing to come to rest and usually moves more than the rest of the tree
• Can help eliminate twinning, through delayed parts (Jones par. 12) "
Here are some examples that i find show good evidence of secondary animation:
working with reference
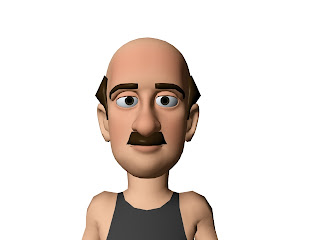
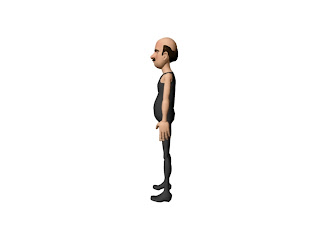
Working with reference is something i nearly NEVER do,apart from the dialogue below that i used for blocking, and for a character animator, its ridiculous so that's what this part of the blog is about! for this part I've decided to use the main character for my film just so that i can really see what things are gonna look like plus it helps me get even more so used to the character rig!
PORTRAYING EMOTION:
i think the main reason referencing your animations is useful is because it helps the animator convey the feeling of emotion through either posing in pictures or even acting it out, if you don't reference your animation your technically blind animating (which is something i think I'm guilty of) and then you run the risk of your animation looking unrealistic and lifeless.
I went to the library at college and tried to find a few books that could help me when it came to expression, anticipation,emotion etc all the traits that make an animation look realistic, the books in the library were good, but most of them weren't really what i was looking for, however, i did come across an interesting book by Andy Wyatt called "The Complete Digital Animation Course-the principles,practice and techniques of successful digital animation" it pretty much covers everything from pre-production to post!
below are pages I've scanned from the book that i found interesting, to summarize its about how the animator must know the in's and out's of the character they are animating, it also talks about how one little movement can change the whole look of the pose/expression and gives examples, the book also indicates that to be a truly great animator you must know the basic theory of acting I've heard many animators discuss the similarities between acting and animating but never really took much notice until now! it's at this point in the blog that I'd like to point out how juvenile i have been and taken everything so laid back its taken me to 3rd year to realize the importance of literally learning everything i possibly can!


So that in mind, below is a few pictures of me conveying expressions with my character doing the same, and a brief description of the movement in my face with each expression, i thought this would be a good exercise for me to try out and i had fun with it if im being honest i can see a big difference in my character expressions to before i did the exercise! REFERENCE IS KEY!
 Okay this is my normal expression, as you can see its pretty boring to say the least but talking of expression I'd say its pretty symmetrical, the corners of my mouth make a downward angle, and my upper eyelids are about halfway down my eyeball's my eyebrows are pretty much straight, a slight curve at the end but that's about it for this pose.
SAD EXPRESSION


SCAN PAGES 441-445 OF THE ILLUSION OF LIFE
i found some useful information in "the illusion of life" describing how back in the day they used to stress how the eye is the best tool for expression and what different eye movements convey different emotions!
now as well as facial expressions posture is another great way to read what the character is feeling so that's what I'll be working on in this next part. this part can also be linked back to life drawing and just how vital it can be to capture the essence of the pose.


below are some examples that I've tried experimenting with to capture some emotion:


PORTRAYING EMOTION:
i think the main reason referencing your animations is useful is because it helps the animator convey the feeling of emotion through either posing in pictures or even acting it out, if you don't reference your animation your technically blind animating (which is something i think I'm guilty of) and then you run the risk of your animation looking unrealistic and lifeless.
I went to the library at college and tried to find a few books that could help me when it came to expression, anticipation,emotion etc all the traits that make an animation look realistic, the books in the library were good, but most of them weren't really what i was looking for, however, i did come across an interesting book by Andy Wyatt called "The Complete Digital Animation Course-the principles,practice and techniques of successful digital animation" it pretty much covers everything from pre-production to post!
below are pages I've scanned from the book that i found interesting, to summarize its about how the animator must know the in's and out's of the character they are animating, it also talks about how one little movement can change the whole look of the pose/expression and gives examples, the book also indicates that to be a truly great animator you must know the basic theory of acting I've heard many animators discuss the similarities between acting and animating but never really took much notice until now! it's at this point in the blog that I'd like to point out how juvenile i have been and taken everything so laid back its taken me to 3rd year to realize the importance of literally learning everything i possibly can!


NORMAL EXPRESSION

SAD EXPRESSION
Okay for this one its mostly about the eyes and eyebrows, the mouth stays pretty much the same except maybe the corners of the mouth are again brought down slightly, but the eyebrows are going diagonally upwards from top to bottom and if you look at my eyelids carefully they follow the eyebrows.

HAPPY EXPRESSION
For the happy expression there is a lot of facial movement, firstly there are dimples but the rig i am using doesn't have dimples so we'll skip that one, nor does it have my horrible bags ha ha but yeah moving on, the eyebrows are pretty much straight except for maybe a soft curve, my eyes are really squinty and my cheeks are raised, the corners of my mouth are both up and my jaw is dropped slightly leaving my mouth open, notice that i am only showing my top teeth and my bottom lip is hiding the bottom teeth.


ANGRY EXPRESSION
With the anger expression the eyebrows are key and they are the exact opposite to the sad expression, they diagonally point in. my mouth is pretty closed in and small and my eyelids are about halfway down.


SHOCKED EXPRESSION


Okay for this expression the face is long, the jaw is mostly open and the corners of the mouth are in slightly, the eyebrows are raised and the eyes are fully open.

CONFUSED EXPRESSION
Right as fun as these are, this is the final one, the confused expression which kinda looks like Im halfway through saying "whaaaat" my eyebrows are pulled in but low which brings my eyelids down causing me to wince, my lip on the right hand side is higher than the left which gives the top of my mouth a downwards diagonal shape my mouth is slightly open and my jaw is slightly lowered, again only showing my top teeth.

SCAN PAGES 441-445 OF THE ILLUSION OF LIFE
now as well as facial expressions posture is another great way to read what the character is feeling so that's what I'll be working on in this next part. this part can also be linked back to life drawing and just how vital it can be to capture the essence of the pose.


ANGRY POSE
The angry pose is something i believe is traditional, i remember as a kid seeing an angry person pose this way, clenched fists in front back leaning forward and a raised head, the key to this pose is to make the figure rigid and tense.
The angry pose is something i believe is traditional, i remember as a kid seeing an angry person pose this way, clenched fists in front back leaning forward and a raised head, the key to this pose is to make the figure rigid and tense.


RELAXED POSE
for the relaxed pose everything is pretty much just mid point, the shoulders are down the fingers are spaced out and loose the head is slightly raised almost like the neck can barely support the head the feet are quite well spread out, the back is pretty much straight except at the top it arch's slightly forward.


SAD POSE
This sad pose is something I would also consider traditional head down, arms hanging back, slouched forward, shoulders forward and feet closed in.
This sad pose is something I would also consider traditional head down, arms hanging back, slouched forward, shoulders forward and feet closed in.


Blocking
Learning how to block is essential for an animator, i don't believe that i myself have given it a lot of thought which is why i have decided to use this project productively and add it to my blog. for this tutorial i am going to try and improve my dialogue scene as i thought it was lacking any movement at all, for this i will be using the clip from the film "zoolander" which is what the piece of dialogue originated from!
Okay here i have sketched out what i think are the key poses in the scene,now looking at it i think this isn't exactly the best example as the poses are very small and not very exaggerated but as a first try i think it will be quite good because its so simple.


Okay so as i learned from the spline tutorial a linear tangent is probably best for blocking out a scene
i also read in that same book that its easier to do your camera shots first and let the camera lead the pose so i think I'm going to try that as well while I'm at it.
Okay here is the timed shots of the camera, i tried to make it as accurate as possible but obviously it will need some tweaking when all the final animation is done.
Okay here i have sketched out what i think are the key poses in the scene,now looking at it i think this isn't exactly the best example as the poses are very small and not very exaggerated but as a first try i think it will be quite good because its so simple.


i also read in that same book that its easier to do your camera shots first and let the camera lead the pose so i think I'm going to try that as well while I'm at it.
Okay here is the timed shots of the camera, i tried to make it as accurate as possible but obviously it will need some tweaking when all the final animation is done.
Okay now that the blocking is done for the camera it is time to block out the poses of the characters.
Okay so for the basic pose i think it all went pretty well, its not identical to the clip but i think it still looks effective and it captures the emotions of the characters, the timing is pretty much all sorted out as well, and although there isn't really much to say for this little trick I've learned, it doesn't mean it's not as important, if anything I'd say its one of the most important things I've learned in character animation and its pretty ridiculous that i haven't learned about it already!
The Legendary Graph Editor
Okay, i've not been using Maya for long but always here a lot about using the graph editor to refine your animation, i think in the time i have used Maya i've used the graph editor about 3 times, and still not exactly knowing what its all about, the book "how to cheat Maya" by Eric Luhta reads "Maya's Graph Editor is easily it's most powerful and most used tool for animating. It's likely that you will spend much of your time working with it, so its a no-brainer that we learn all the ins and outs of this fantastic editor".


for this tutorial I will be using “how to cheat maya” because at this point in time I have no solid animation for my final project with Mike so I think its easier to go a long with this tutorial.
Okay so for this tutorial they have given me a ball with a control handle below is what we have in the graph editor when I click the control, and the second picture is the ball itself.


and if I playblast the file this is what I get
what im going to do now is follow the tutorial and see what results I can come up with to see if we can make this ball bounce any smoother!
I also learnt this useful skill where you can mute translation, this is what happens when I mute translate X
when a translation is muted the line in the graph editor becomes dotted shown in the screenshot below:

Okay within the tutorial I am told to change files, im now given a ball with no translate Y or translate Z I believe this is what I am about to be working on to make the ball bounce.
okay so then im asked to experiment a bit with the why translation and set some keys i've come up with this (I also set my tangents to linear)
Okay I know from recent tutorials and lessons that the shape below is the general gist of what I should be going for in the graph editor for a bouncy ball, its a little bit messy but hopefully when I playblast ill get a good enough result.

and this is the playblasted clip.
Okay Ive decided that there are way too many keys in my ball bounce so i've started again, but now the lines look much smoother in the graph editor

this is what it looks like
INSERTSMOOTHLINESPLAYBLAST
I then decided to play about with the rotate Z (as instructed by the tutorial) and it took me a few go's to understand what way it went but it actually is fairly simple, this is how it looks in the graph editor...

and this is my final playblast I think it works really well and im quite proud!
Splines
to learn this trick I will be reading and learning from “how to cheat Maya”
to get a grip on the use of splines im going to follow a disc tutorial that came with the book, using “The Goon” rig as the character I am using for my project isn't finished yet.
The file loads up and im given an arm movement that rotates up on the z axis, here is a playblast of what I am viewing.
this is what it all looks like in my graph editor

as you can see by the movement its all very even and in the graph editor they are more or less the same distance away from eachother. I am also told in the book that even though the graph editor shows the line going down, the arm is moving up, the book stresses that this is because it is not a direct representation of what happens but its just a change in value, depending on the rig, depends on what way the arm will move.
EXPERIMENTING WITH SPLINES:
what the book really stresses is just to experiment with the splines in the graph editor, and thats apparently the easiest way to grasp what theyre all about so here are a few playblasts and screen shots of what happens when I change the value's using the graph editor.
Okay what i've done here is make the dip a little harsher in the graph editor, trying to make the curves angle much more shallow

what happens here is that after frame 16 the value changes so that the speed gets slower after

Okay now what ive done is i've lifted the keyframe all the way up past the original value at frame one, and because of that reason it seems that the arm will go back in the opposite direction, shown in the playblast below:
Okay with this next one what ive done is Ive brought the last frame all the way down so that the value is zero, I predicted that the arm after frame 16 would come to a stop,

right final one, what i've decided to do is completely reverse the first example we were given and hopefully what we will be looking for is a reverse outcome!

okay so yeah my theory was correct the playblast below is an exact opposite of the first video up above, I feel like im starting to see how these splines work and how using them in my final piece could really help tweek things up a bit.
So back to doing the tutorial.

For this next part I am told to open up a different file so this is why The Goon is now gone and it is replaced by a ball. This part of the tutorial is looking at Tangent types .

This tutorial is to show how much changing the tangent type can effect the shape of a movement.

the spline tangent shows us smooth interpolation, and its good on transitional keys where the curve is the same direction on both sides this tends to create overshoots in the curve.

clamped tangents have smooth interpolation and unlike the spline tangent it doesn't overshoot keys with close or identical values, the first and last keys in the curves are splined , its also good for moving from spline mode to stepped keys

The Linear tangent gives you a direct line from key to key and it makes spacing between two keys perfectly even, sharp angles into curves makes this tangent tool very useful for keys where an object meets another object at full momentum, tis can also be used for blocking to prevent any computer created eases.

creates plateu's at keys that are perfectly flat, automatically puts an ease-out and ease-in on a key, it never overshoots and its good for keys at extremes and its also good for keys where a value needs to hold through frames.

For stepped tangent there are no interpolation between keys, it holds until the next keyframe and is used for pose to pose blocking.

Plateau tangents are exactly the same as clamped tangents except the first and last keys in the curve are flat.


above are picture references to show how the splines should look for certain purposes, these will come in handy when it comes to animating my final piece.
In conclusion I definitely will be using splines in my final piece, its a nice clean simple way to tidy up an animation. Its one of them things that look a lot more complexed than it is. Unfortunately I couldn't really apply it to my own stuff just yet but ill defintiely refer back to this post when I do use it.
Subscribe to:
Posts (Atom)